I've always wanted to design and build, as much as possible, the engagement ring I'd use!
Well the day has come for me to start!
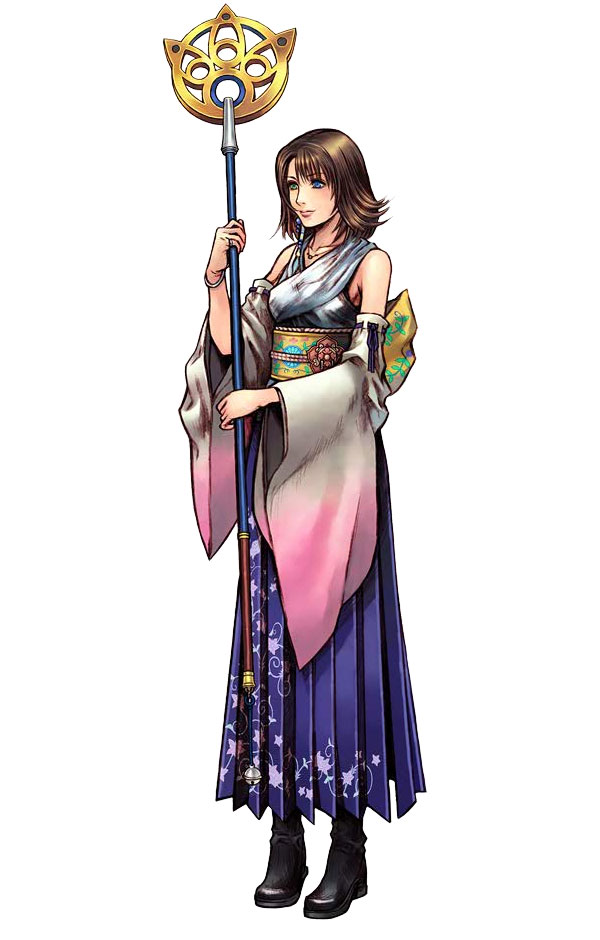
I began by sitting down and looking up rings my girlfriend like the most, and finding references of shapes she loved. One of the shapes was Yuna's staff from Final Fantasy 10:
Picture for Engagement Ring
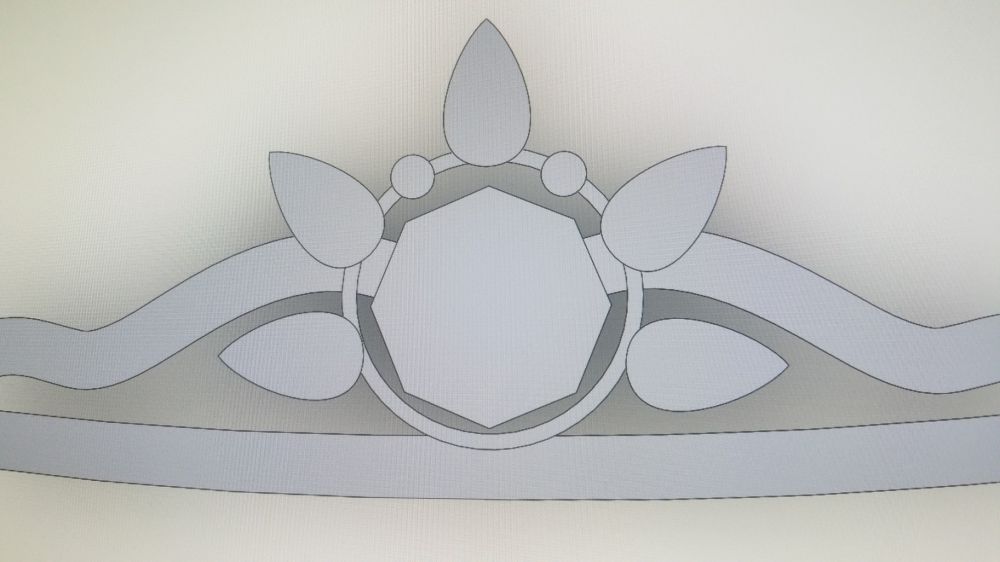
After that, we came up with this general shape:
Picture for Engagement Ring
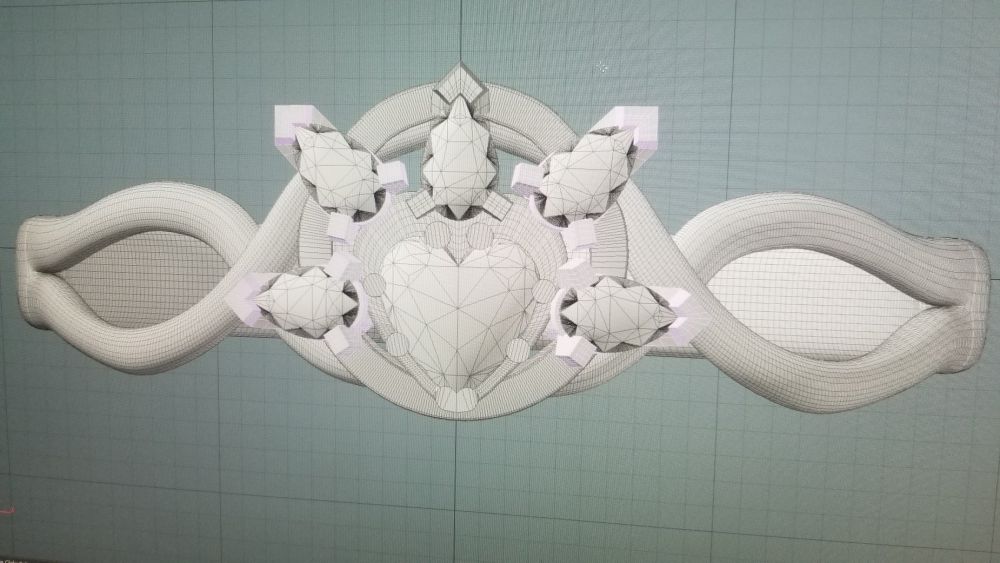
Once we had that, I got started on modeling it up in Modo Indie 10!
Jan 31st, 2018 @ 10:29 am
A couple more months of modeling, and the second round of prints went well. I was able to reduce the 5 surrounding pear diamond carats (which will save me alot of $!) since the proportions all had to change.
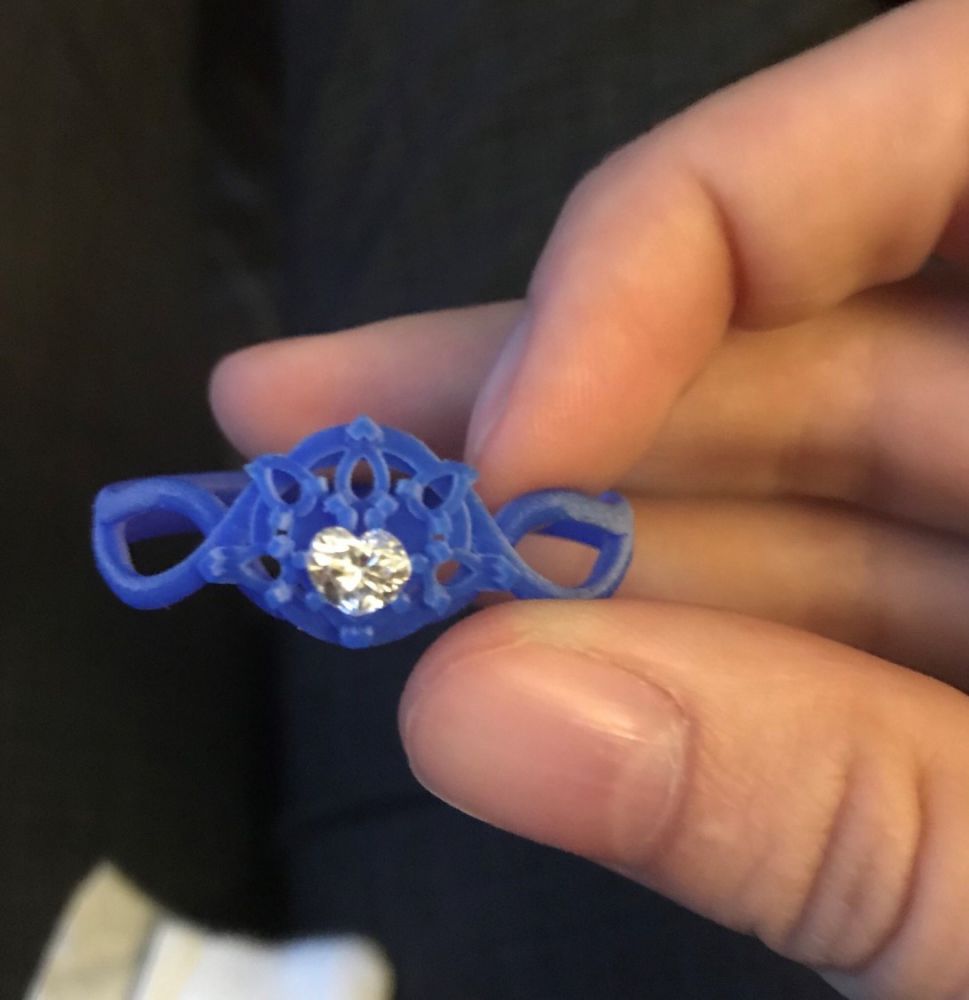
Here is the plastic and wax versions:
Picture for Picture for
We started going to get pricing for various jewelers for the stones, and the cost to have them set the stones for us if we brought them in a white-gold version of the ring (Shapeways will cast it into precious metals as an option).
Jan 31st, 2018 @ 5:36 pm
The first round of modeling resulted in this:
Picture for
Which is nice.... but there were two problems:
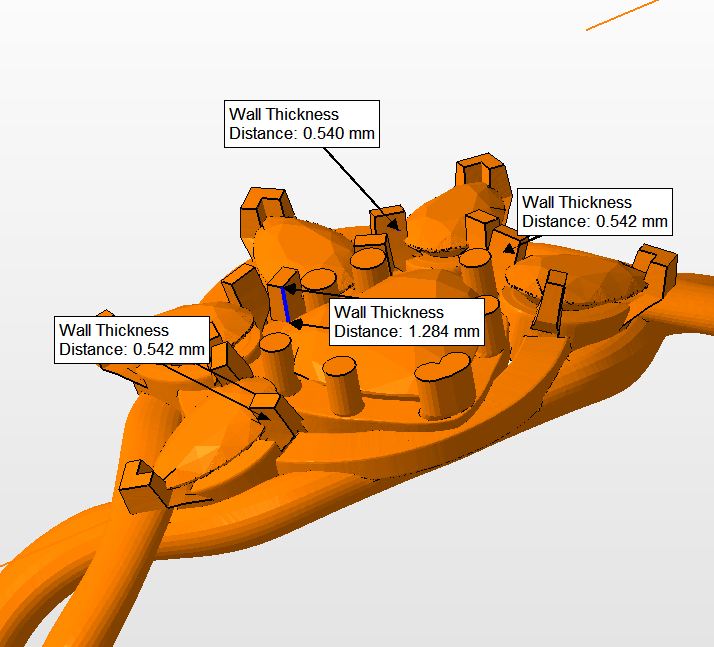
1) I chose to use Shapeways for my prints, since I wanted high-accuracy since I was dealing with such a small object. This is good, but when I went to print, they emailed me telling me that after they reviewed the model, they noticed the wall thicknesses at a few areas were below their minimum threshold of being able to ensure a good print:
Picture for
2) So that took some fixing. After that, I got it printed.... but once it showed up I realized that I modeled the ENTIRE RING based on a mistake: When I started the model I first made a sizing-cylinder that was basically just a cyinder with a diameter equal to my girlfriends ring-size. I modeled the entire ring around that cylinder.
The problem was that I didn't notice when making the cylinder that it was asking me for the radius of the cylinder... I misread it somehow and put the diameter in for the radius. The first print showed up and it was nearly a bracelet! Exactly twice as large as it needed to be!
Picture for
I can't just scale the entire thing by 50% and call it good since the stones are specific carats (and the diamond in the center we changed to a heart since her mom provided us with her diamond from her ring, and it was a specific size and heart-shape already....I had to design around it).... so back to the modeling!......
Jan 31st, 2018 @ 5:49 pm
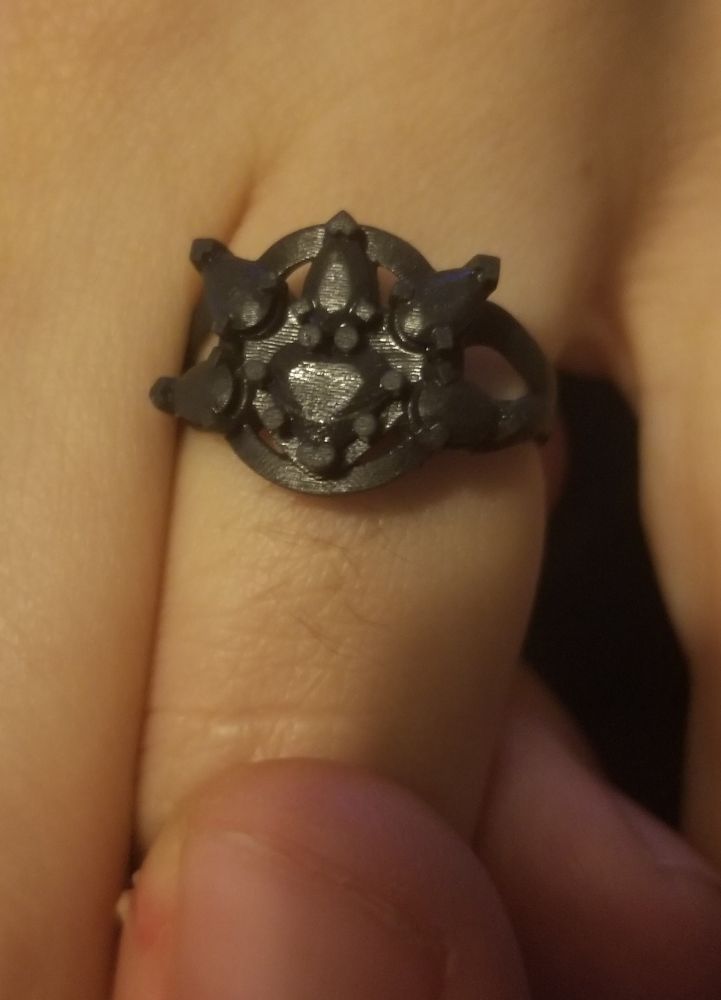
This brings us to where I am now with this ring: The third and final print.
I made more more adjustment from print 2 to print 3: the top prongs of the middle heart diamond were too close and making it hard to see the crevise of the heart-diamond (the top of the heart). So I moved the top pear up slightly, and moved the top prongs of the heart setting out slightly, and reordered a new plastic and wax print.
We also decided that, since it would cost a bit over $200 for Shapeways to print it to White Gold, we got more quotes from jewelers asking them what it would cost to cast it for us if we handed them the castable-wax model.
It ended up being only $500 more than just for the stones itself, which was worth the warranty that would also allow us to get from the jeweler, so we went with that!
Here is the digital version of print #3:
Picture for
We ended up going with Jareds since they were one of the cheapest, and had the best warranty... also being a large company with stores everywhere was a nice perk.
We handed them the wax model and are currently waiting for it to be finished... we were told about the end of February.
Dec 6th, 2019 @ 1:31 pm
SHE SAID "YES"
I completely forgot to come back here and update this when it actually happened... but the ring was finished and she said yes!
I took the wax cast into Jarred and they cast it, polished it, and set the stones for me.
If anyone else tries this, I recommend making the model about a mm thicker than you actually want it to be, because once they polished it, the fit was no longer perfect and the band was really thin both due to the polishing they did.
Also, bring them more than one wax cast and let them know you can print more if needed, because they were hesitant to do it until I mentioned that, due to the chance of it breaking (they thought we had an artist carve it by hand) ... Also the wax cast is really dry and more brittle than they're used to working with, so it took them two casts to finally make it work.